This is a quick 'how to' on clutch master cylinder replacement. I just wrote and almost finished it until I accidentally hit the backspace button going back a page on my internet browser. This effectively cleared the text field, so please forgive me for any mistakes made due to haste. I also replaced it yesterday so I may have forgot some stuff. Also feel free to add any tips that would help out. The replacement is actually quite simple. Basic hand tools and a good prybar are requried. An assistant is also recommended for this procedure. ***I am also not responsible for any damages incurred during this procedure for any reason. Attempt this at your own risk.***
-Remove the locking pin and pedal pin of the clutch pedal/cylinder rod fork.
-Remove the top mount intercooler if equipped.
-Remove the coolant overflow bottle and its base
-remove the clutch fluid reservoir cap and loosen the slave cylinder bleed screw to drain the fluid from the system. If you have a pneumatic brake bleeder I would recommend that tool to evacuate the fluid from the system.
-remove the fixing bolts for the power steering pressure hose and brake booster line
-disconnect the brake booster hose
-remove the power steering pressure hose banjo bolt and retain it and the 2 copper washers. You will lose very little fluid from disconnecting this hose. Also wrap it the open end with a shop towel and route it out of the way
-remove the clutch fluid reservoir. If you can, remove the supply hose. If the cylinder end of the hose has the clamp bolt at an odd angle to access, you can remove it later. It's also a good idea to clean out the hose as it can contain sludge from old fluid. Note that that hose for the GTI-R is discontinued now, so if it's old and cracking, you will have to match up a suitable replacement.
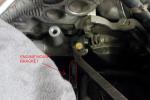
-remove the clutch fluid reservoir bracket. The bracke it held in place by 2 studs with 10mm nuts. The studs are behind the cowl and are connected together by a plate. I advise to put a nut back on one of the studs after the bracket has been removed to prevent the stud plate from falling inside the cowl.
-support the bottom of the engine lower oil pan with a block of wood or something similar to prevent the damage of the pan.
-remove the right engine mount; now you can lift/lower the engine to create more room to access the supply hose hose clamp bolt, the cylinder body fixing nuts and the flare nut for the clutch line.
-crack loose the clutch line flare nut. I recommend a good flare nut wrench. The size is 10mm. After it is cracked loose, you can use an open end wrench to further loosen it until you can by hand.
-move the clutch line out of the way
-remove the 2 cylinder body to firewall nuts (12mm). I recommend using a deep socket with a short extension and a 3/8" drive ratchet. Loosen them until they are finger tight and can be removed by hand. If you haven't remove the supply hose, you can pull the cylinder body out and rotate it to gain access to the bolt head of the clamp adjuster.
-reinstall the front most bolt of the engine mount; this is one of the 3 that hold the engine mount to the engine. Install the bolt enough that the threads are engaged but the head does not bottom out. The bolt will be used to pry against.
-get an assistant to pry against the bolt and the mount bracket on the frame of the vehicle.
-This should give you ample room to remove the cylinder out at an angle towards the right strut tower. Remember that the clutch master cylinder rod can pivot so it will come out at an angle from hole in the firewall. I removed one of the upper intake plenum bolts, but I do not think it's required.
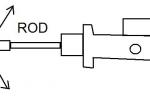
-Remove the cylinder and replace/overhaul it. If it's new, remove the protective cap and compare the rod adjustment. Adjust to spec if necessary. You can always adjust it later too, if required.
-Reinstall the cylinder with the help of your assistant.
-seat the cylinder against the firewall and inspect the pedal linkage to make sure the rod fork is in proper alignment over the pedal arm. If it's good, proceed to reinstall the clutch cylinder. If it's not, remove and reinstall it and inspect it again.
-loosely install the 12 mm fixing nuts and the clutch line flare nut. If it's loose, you have more room to move the cylinder body in a proper position to align the flare nut squarely into the cylinder. Do not cross thread the flare nut. Start it loosely by hand and with an open end wrench. If it starts and turns in easily, get a few threads in and tighten the 12mm nuts and the flare nut.
-check that the clutch line is placed back in its plastic bracket against the firewall. If not, you can push against it with a pry bar with a shop rag to seat it.
-Reinstall all aforementioned parts to the point where it is time to bleed the clutch.
-The pedal pin may require you to have the pedal moved slightly in to line up the pin holes.
Bleeding the clutch:
-fill the reservoir.
-apply and unapply the clutch pedal several times. You may need to do it by hand as the pedal might not return from the air in the system.
-if you have a pneumatic brake bleeder, I recommend attaching this to the bleed screw and running it while topping up the fluid at the same time. It worked flawlessly. I still manually bled it to make sure, but no air came out.
-have the assistant hold the pedal down. Crack the bleed screw loose(10mm head). Fluid with air may come out. Air in the fluid will cause a spitting/spurting sound accompanied by bubbles and a temporary lack of flowof fluid. After the fluid/air stops coming out of the bleeder screw, retighten the screw.
-have the assistant actuate the clutch a few times and then hold the pedal down again. Crack the bleeder and check the fluid exiting for air. Retighten the bleeder screw. Note that as you bleed more air from the system, the pedal should start to return by itself . It's also important to make sure that the pedal is down when you open the bleeder and that the pedal does not get released with the bleeder open. This may cause air to enter the system.
-Check and adjuste the clutch fluid level and repeat the last 2 steps until a steady stream of fluid comes out of the bleeder screw.That will be the point that the air has been removed from the hydraulic system.
-Confirm that the pedal feel is proper and clean the area from fluid splatter. Water washes away brake fluid with great ease; a garden hose spray gun is good for this.
Road test the vehicle and confirm clutch operation is normal.


